반응형 웹페이지 제작(blog) #1-2
190702
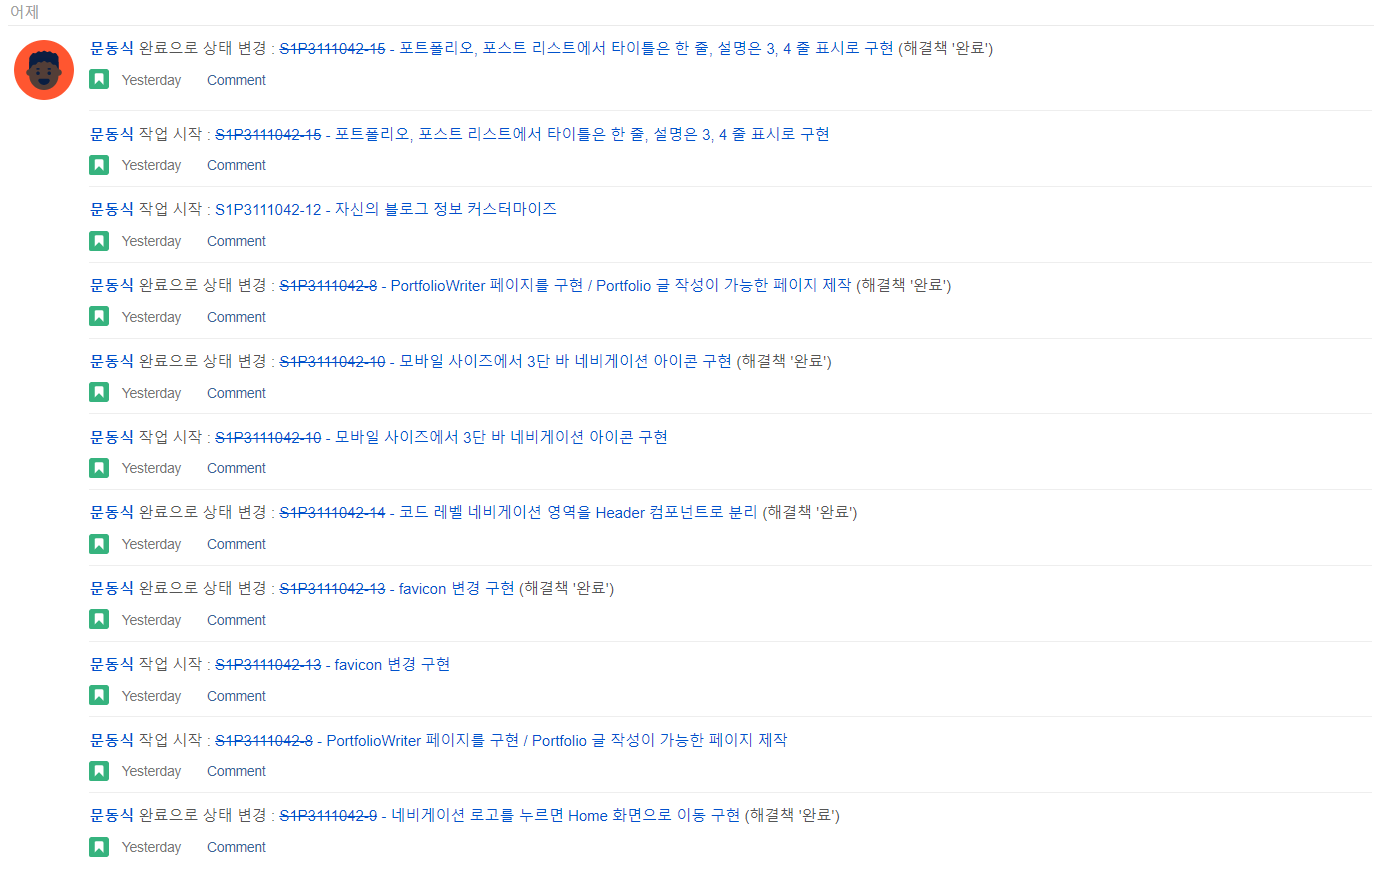
- 포트폴리오, 포스트 리스트에서 타이틀은 한 줄, 설명은 3~4줄로 표시구현
- PortfolioWriter 페이지 구현 / Portfolio 글 작성이 가능한 페이지 제작
- 모바일 사이즈에서 3단 바 네비게이션 아이콘 구현
- 코드 레벨 네비게이션 영역을 Header 컴포넌트로 분리
- favicon 구현
- 네비게이션 로고를 누르면 Home 화면으로 이동구현
jira
- Jira를 이용한 이슈 & 프로젝트 트래킹 관리

웹페이지에 마크다운 에디터 넣기
- nhn 에서 만든
Tui editor(toast ui editor)
https://github.com/nhnent/tui.editor
-
Vue에 적용하려면 컴포넌트화 시켜야 됨
-
미리만들어진 컴포넌트를 끼워 넣기만 하면 됨
-
설치
1
npm install --save @toast-ui/vue-editor
-
화면에 넣어보기
- Tuieditor.vue
1
2
3
4
5
6
7
8
9
10
11
12
13
14
15
16
17
18
19
20
21
22
23
24
25
26
27
28
29
30
31
32
33
<template>
  <v-container fluid :grid-list-md="!$vuetify.breakpoint.xs">
    <v-layout wrap row>
      <v-flex xs12 sm6>
        <editor v-model="editorText"/>
      </v-flex>
      <v-flex xs12 sm6>
        <viewer :value="editorText" />
      </v-flex>
      <v-flex xs12>
        <span></span>
      </v-flex>
    </v-layout>
  </v-container>
</template>
<script>
import 'tui-editor/dist/tui-editor.css'
import 'tui-editor/dist/tui-editor-contents.css'
import 'codemirror/lib/codemirror.css'
import { Editor, Viewer } from '@toast-ui/vue-editor'

export default {
  components: {
    'editor': Editor,
    'viewer': Viewer
  },
  data () {
    return {
      editorText: ''
    }
  }
}
</script>
-
결과
- 디비에 저장되어야 할 내용은 하단에 표시된 내용
-
수정
- vuetify를 이용
dialog를 이용해서 사용
1
2
3
4
5
6
7
8
9
10
11
12
13
14
15
16
17
18
19
20
21
22
<v-dialog v-model="dialog" persistent full-width>
        <template v-slot:activator="{ on }">
          <v-btn dark v-on="on" class="pink accent-3" style="color:white;">글 추가하기</v-btn>
        </template>
        <v-card>
          <v-card-title>
            <span class="headline">Write Portfolio</span>
          </v-card-title>
          <Tuieditor></Tuieditor>
          <v-divider></v-divider>
          <v-card-actions>
            <v-spacer></v-spacer>
            <v-btn
              color="primary"
              flat
              @click="dialog = false"
            >
              확인
            </v-btn>
          </v-card-actions>
        </v-card>
      </v-dialog>
-
vue SimpleMDE를 이용하면 npm 설치 없이 가능….!!!!!!!! -
참고사이트 : fkkmemi님 블로그